People often wear braids, especially French braids, in their hair. But you can change your look by turning the braid upside down to make an upside-down French braid.
Today, it’s hard to think of a way to make a beautiful, unique hairstyle without a French braid. This isn’t surprising since the French braid is easy to do and very comfortable. She looks great in a lot of different ways. It can be used on its own or as part of another hairstyle. There are also many different kinds of this braid, which is another plus. You can pick a hairstyle for a date, work, a business meeting, or a party in other ways.
Before you can think about how to do a French braid right, you need to know more about it. When did it first come out, and what made it so popular? There is a story that French braid weaving was first done in the south-east of Algeria.
The French braid has been popular for a long time, but it has become more important in the past few years. This is because people have come up with many different ways to weave in recent years. So TODAY, we’re going to learn new ways to braid our hair:
How to make a French braid
You can get a great hairstyle that you do yourself by using our beauty tips and some home remedies.
- Take a small piece of hair from the top of the head (about 4 centimeters wide), get it all to start at the same height, and divide it into three equal strands.
- Start braiding like a traditional braid, passing the right strand over the other two, the left strand on top, etc.
- Separate the remaining hair into similar-sized strands. Clip or rubber band them if your hair is unruly.
- Continue braiding until the neckline. Add one strand from the left side of the head when braiding to the right and from the right when braiding to the left. More hair at each step means fewer crossings in the braid. Adding a small amount of hair at each stage makes the braid more complicated.
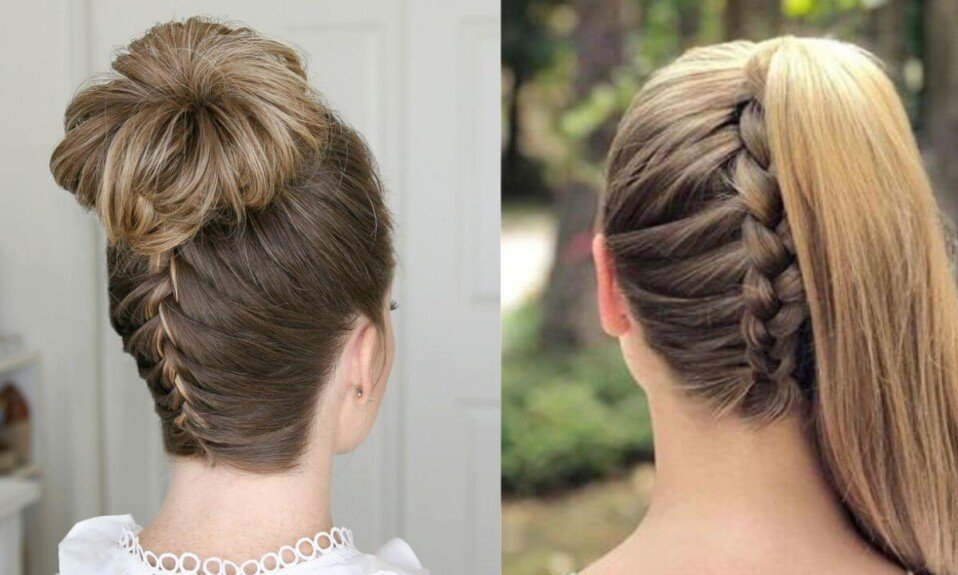
- When you’re done braiding, gather the end into a traditional braid or a ponytail. The inverted French braid, also called the Dutch braid, is a variant of the French braid in which strands are added as you go, but in reverse, that is, from the right side of the head when braiding to the right and from the left when braiding to the left.
(1) Braid in pony

Braids can be anything from dressy to casual. This trendy French braid ponytail looks easygoing and is perfect for a laid-back Sunday brunch or a bike ride through the park.
(2) Sleek bow braid

You don’t have to finish your upside-down braid with a regular bun. The cute and girly updo with a bow is the best way to describe it.
(3) Braids and flowers

Even though it’s usual for an upside-down French braid to go up, there’s no reason it can’t go to the side and be paired with another braid.
(4) Braided updo

The simple updo with an upside-down braid and a pulled-apart braided bun has a lot of personalities. If you have balayage in your hair, braid it loosely to add depth.
(5) Messy flipped braid and bun
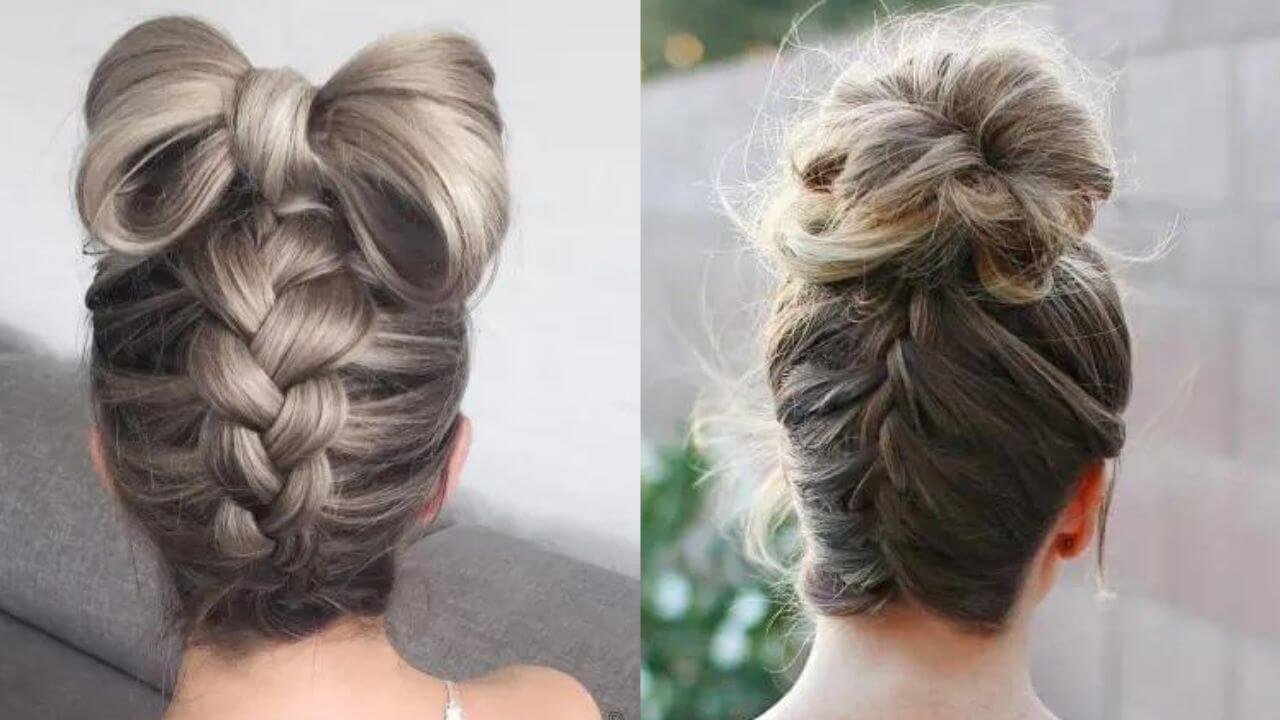
At first glance, this hairstyle doesn’t look like it has many braids. It’s mostly just crisscrossed sections. But there is still a loose, messy braid. Finish it off with a loose ballerina bun, and you’ll have a great summer style that you can wear anywhere.
(6) Upside-down braid into a messy bun

Fit girls were made for upside-down braids. Since most of her hair is loose on her head instead of on the bottom, where it could quickly get wet, she can start spin class and maybe even skip shampooing every once in a while. When!
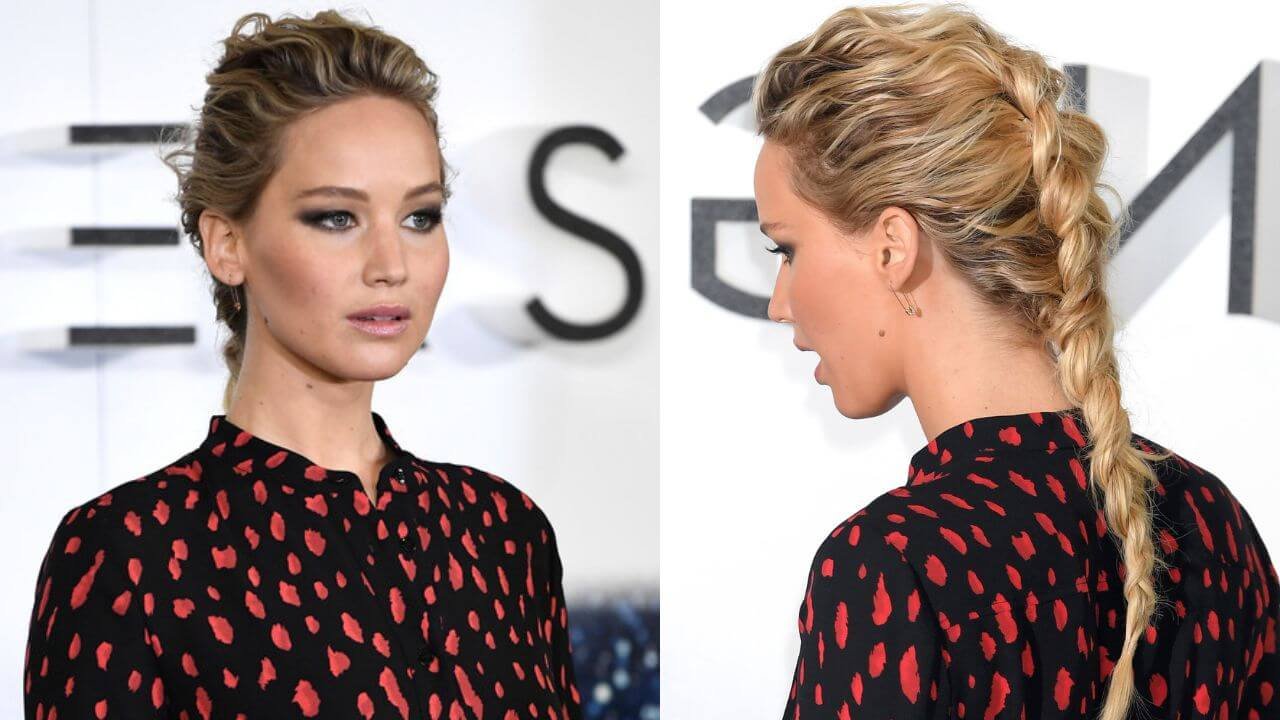
(7) Casual bun with highlights

French braids are cute, young, and classic, and people have been wearing them for hundreds of years. Try putting your hair up in a messy bun to update the look. The key is not to look like everything fits together, so leave some loose ends.
(8) Simple french braid

- Comb your hair well. Dry, paint-burned, or wrong hair needs detangling spray.
- Split a small group of parietal hair into three pieces. Move the right strand to the middle. Leftover middle. Next, continue weaving by incorporating hair from each side into a braid.
- You can put the rest of your hair in a bun when you’re done or braid it.
(9) Reverse french braid
The French inverted braid, or “reverse,” is similar to spikelets, dragons, etc. It can be large and round, unlike its “sisters.” Without bouffants or other complicated hairstyles, you can achieve this look.
(10) Flower braid

To get this braided flower style:
- Start by taking a small front lock from one side and French braiding it until you get halfway down the middle.
- Start braiding it diagonally, so the ends are on the right and the left.
- Start another braid on the left and finish it.
- Spread out the braid and roll it into the shape of a flower.
(11) Two braided looks

Start by making a ponytail out of your hair. You can use the loose ends as sports locks in the front. When the pony is done, split the hair into two pieces and braid each separately. Make sure to fan the braid properly to give it more volume. Wrap and roll the braid into a bun and add a bow for added fun.
(12) Braid wrapped

This look is easy enough that you can do it quickly. You’ll need four or five hair clips for this. Split the hair into three or four sections, and then braid each section on its own. Once the braid is done, twist and pin the ends together to make a bun.
(13) Lower braid

Just put your hair in a high ponytail and make sure it’s combed and smoothed the right way. The ponytail and hair must both be tight. Leave a small piece of hair out of the ponytail, then roll the rest of the hair into a bun. Now braid the loose ribbon and wrap it around.
(14) Triple braid

A French braid starts at the top of the head and goes all the way down to the middle of the head. It is used to make braided hair buns. Make separate French braids with the other strands next to the main part. When you’re done with all three braids, roll up the rest of your hair and put it in a bun.
(15) Sock braid bun

Start by braiding the front locks on both sides, then pull them back up and tie them into a ponytail. The next step is to tie a sock bun and secure it tightly at the back of the head.