Many of our readers are interested in braids and the ways we show how to braid hair. I’ve discussed modern braids, focusing on two types and their variations. How to make them is explained below.
The fishtail braid also called the “pike tail,” is one of the quickest and most versatile ways to style your hair. Recently, these kinds of pigtails have become very popular. This is because shows from well-known brands, photo sets from glossy magazines, and pictures from well-known Internet bloggers all helped spread the word. So, if you haven’t learned how to weave a “fishtail” yet, I suggest you think about a few interesting ways to make this hairstyle.
How to do:
(1) Part your hair

- Comb your hair, pull it apart where it meets the side of your head, and throw it over the other shoulder.
- Collect the rest of the hair from the side opposite the part that was pulled out.
- If you parted your hair on the right, it should fall on your left shoulder, and vice versa.
(2) Separate your hair into two parts
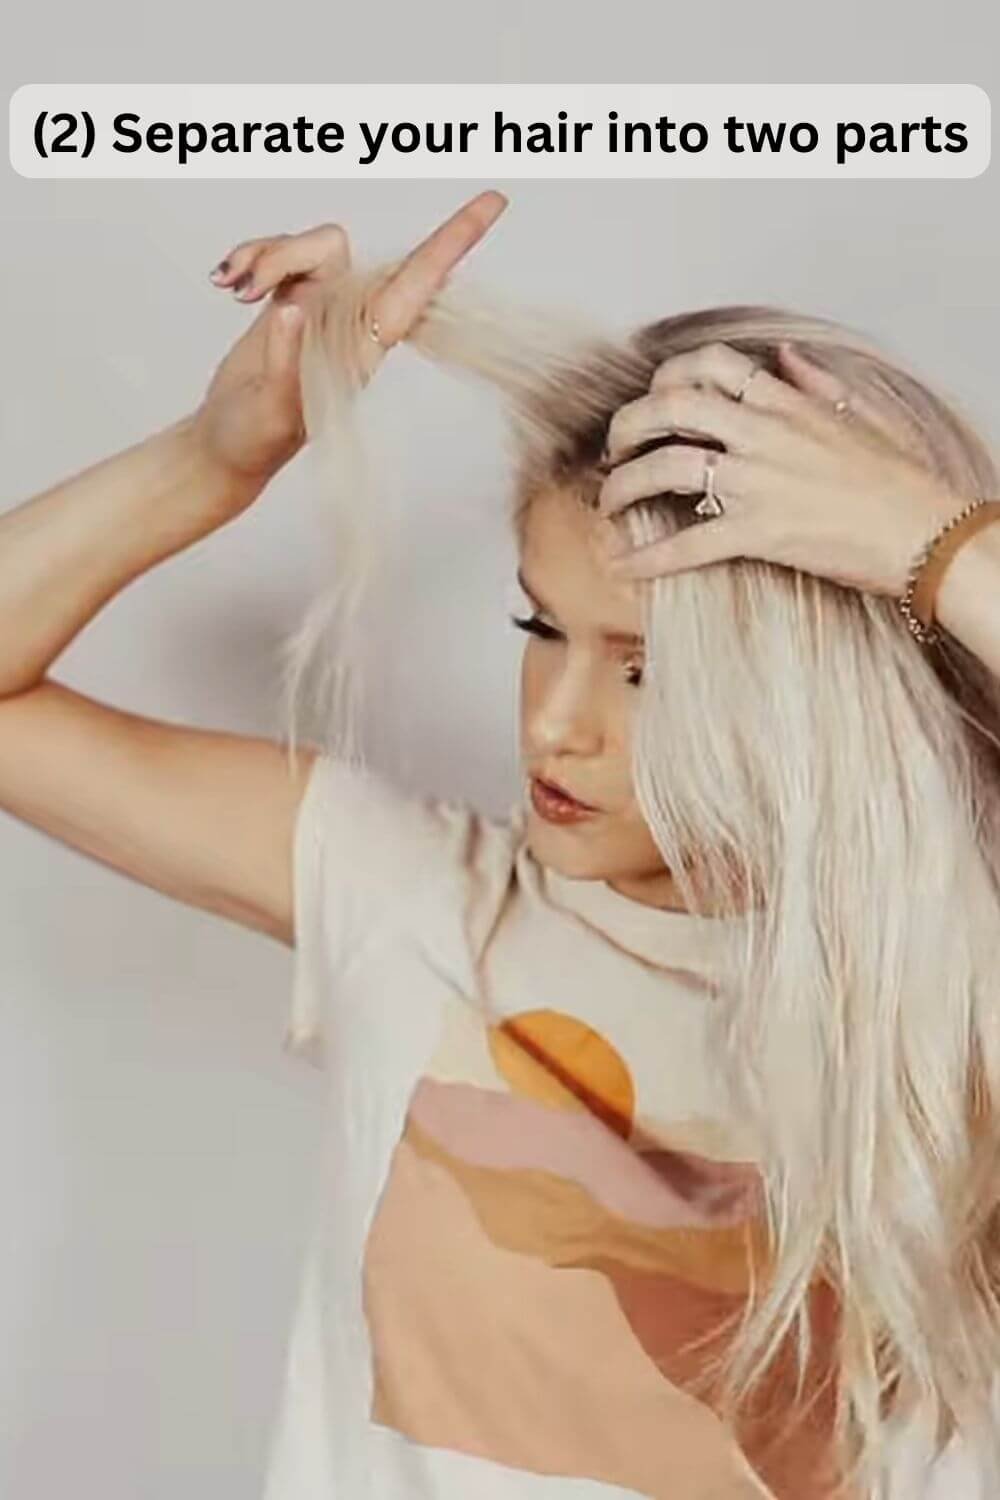
Take both of your hands and divide your hair into two equal parts. Please make sure that the hair between the strands is not tangled.
(3) Start making your fishtail braid

- Start the fishtail braid by holding the hair with both hands to the side of the head.
- Separate a small piece of hair from the edge of one of the chosen strands, making three separate strands.
- Put the third, thinner strand between the other two.
- Now, the third strand of hair is connected to the part of the hair you took out at the start. Again, the hair is split into two parts.
- Do the same thing with the other piece of hair.
- Get the third strand by taking a small piece of hair from the side of the part where you haven’t taken any hair yet. Put this third strand over the first one.
- Now, the third strand is joined to the first part of the hair. Again, the hair is split into two parts.
- Pull two strands in opposite directions to make something tight.
(4) Keep adding more hair strands

Add small strands of hair to the braid by separating them from the loose hair and crossing them with the main strands, as you did in step 3. After you finish each level, make sure to pull the braid tight.
The fishtail will look like a braid that is turned upside down. There are only two strands intertwined, and the braid looks like a fishtail.
(5) Loosen your braid

Most of the time, the fishtail hairstyle is made to look a little messy, giving the impression of sloppiness. To get this look, pull out a few strands of hair to make the style look a little messy.
- You can pull on both strands at some levels of the braid to make them looser and give the hairstyle more texture.
- If you can’t do this braid by yourself, put an elastic band around your hair when you throw it over your shoulder.
- Follow the directions on how to braid.
- Then, use scissors to carefully cut the elastic out of the hair.
- You will end up with the same careless look as if you had not used an elastic band.
- When you take off the elastic, loosen the strands.
How to braid a fishtail on the side
(1) Make a ponytail with your hair

Put an elastic band around the back of the head to hold the tail in place. Make sure you have a rubber band you’re not afraid to cut.
(2) Start making your fishtail braids

Split your hair into two parts that are the same size. Take a small piece of hair from the right side and throw it over the strand, connecting it to the left side. Now, pull out a thin strand of hair on the left, throw it over the strand, and connect it to the hair on the right. When you’re done with each level of the braid, pull the sections of hair in different directions to make it tight. Repeat the process until the whole ponytail is braided.
Make sure the small pieces are connected to the rest of the hair. During weaving, you shouldn’t have a lot of small pieces left over.
Start this braid at the top of your head for another way. You don’t need an elastic band if you start at the crown. You’ll start with two sections of hair. Add more hair strands and keep weaving until you reach the back of the head. If you try to do this hairstyle on your own, you might need help from someone else.
(3) Put your hair up
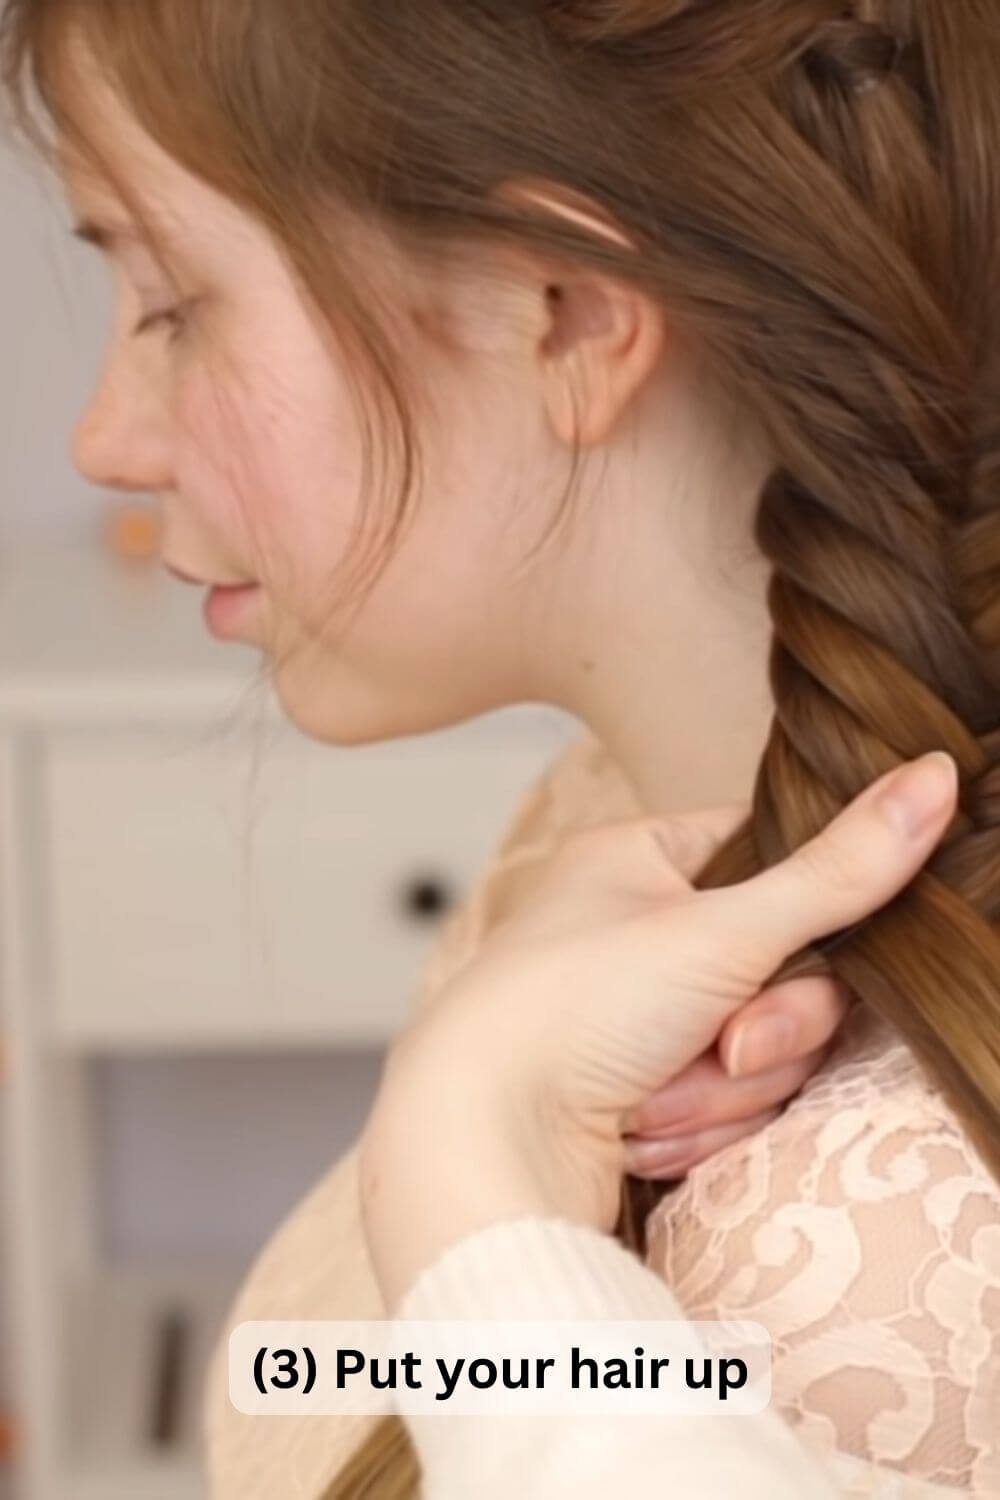
Use an elastic band to hold the end of the braid together. Use scissors to cut the elastic out of the hair in a careful way. Pull the strands gently to the sides to loosen the braid. Throw the braid over your shoulder to finish the look.
The braid weaving is finally done.